BUILDING the BR52 LOCOMOTIVE and TENDER
There was a great need for locomotives during the second world war in Germany.The construction of classes 44,50.and 86 were simplified and orders for other types of locos was cancelled.
The need for a simpler type loco saw the creation of the BR52 CLASS in 1941.
These machines came with an axle load of 15 tonnes and a maximum speed of 80kph (44mph) forwards or
backwards.
Significant quantities of materials and manpower were able to be reduced further reducing their cost.
This model was built in 1943.
Weight was 149.t tonnes
Length was 75 feet 4 inches (22.975mm)
Boiler Pressure 240 psi
Driving Wheel diameter 1400mm.
Coal capacity 10 tonnes
Water 5715 gallons
The Box Art Illustrates the model which is produced by Trumpeter Models at 1/35 scale. The overall length
of the model is 886mm (34 inches) with a height of 134.2mm (6 inches).
There is a 36 page illustrated set of instructions with a colour sheet of recommended finishes.


The rail track was the first item to be assembled. A very clever design and easy to put together,
I painted the assembled track with an auto flat black under coat.Two coats of Future (Pledge in Australia) were applied . The highlights of the ballast were dry brushed with Humbrol steel and the then washed with burnt sienna. Rust was applied where needed and silver on the rails.This will eventually be set on timber to enforce more rigidity. Will look at further refining when near the end of build.


There are 710 pieces to this build plus the photo etch .Going by the instruction sequence the main frame assembly was started.
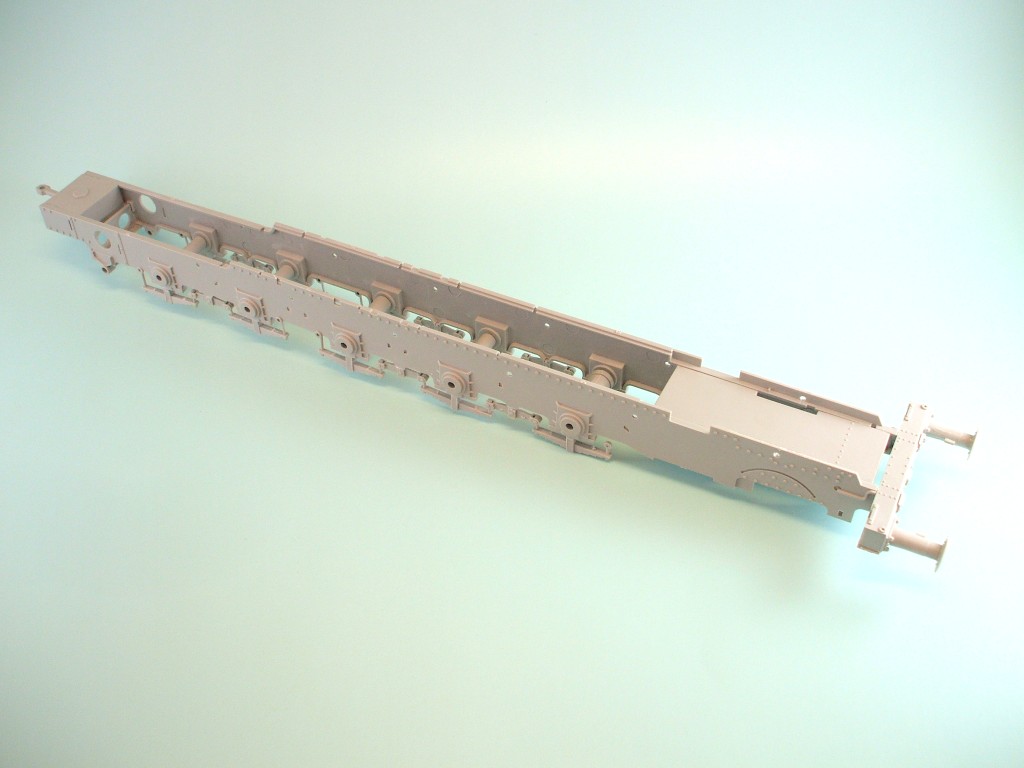


When all the parts nominated in the instructions were assembled I sprayed the frame with a red oxide under coat.
This was done as the red oxide will give a hint of rust to some spots which will help make the model realistic
as a working engine.
I have used this technique on boats and it works well.


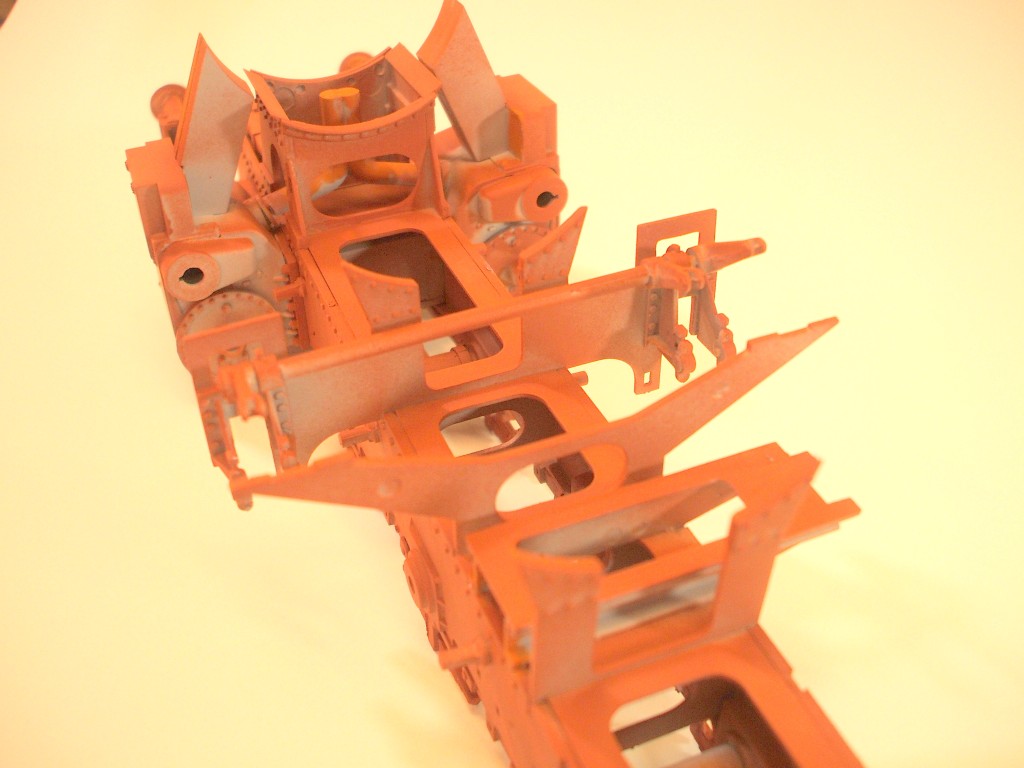
Now the final coats on this assembly take place using Tamiya XF 1Flat Black. This was thinned and
misted on using several passes. By carefully picking your placement the red oxide seems to appear as a haze giving a slightly older effect. Two coats of Future was applied. Rivets and bolts were highlited using Humbrol 53 enamel. A suitable wash will be applied at a later date.....possibly before the assembly of the main boiler.


This completed the sequence outlined in the manufacturers instructions for the first part of the build.

The cabin is suggested as next item to build but as I am awaiting some Eduard Interior photo etch for this part of the build so I will start on the Tender next which I shall complete before going further.

As stated I am waiting on some photo etch so have started on the tender. Progress to date.Paint on the sprue
wherever possible. I like to leave them on as not recognising the numbers will get you into a lot of trouble when parts are left and right.


It is advisable to paint as many parts on the sprue as possible as masking would be very difficult on the finished model. Using my technique of ageing my model with most sections primed with red oxide .
This is not the final stage of finishing as I will give it a coat of Future and a wash when the rest of the tender is finished.
The Body of the tender was assembled and painted with red oxide undercoat.


The coal was then added (this was small rocks from a florist shop and painted black) as the plastic rendition was very false in effect.
CONTINUING THE TENDER BUILD.
.JPG)
.JPG)
I made provision in the tender to house a battery in case I decide to light up the drivers cabin. The coal has been stuck together so the top can be removed at any time.
The tender is almost finished but the final weathering and touch up will be left until the engine is done so I do not have two different finishes. It has been sprayed with Future to save any damage but in the end a matt finish will be applied to the engine and tender.
.jpg)
.jpg)
.jpg)
.jpg)
.jpg)
STARTING ON THE CABIN.
I purchased the Eduard photo etch kit for the cabin which has now arrived. This would need the skills of a watchmaker to install but here goes.! I was pleased that a printed sheet was included for the instruments.
.JPG)
Just a start on the cabin will post the finished section soon.
.JPG)
The cabin has been completed using the Eduard photo etch as supplementary components.
The Cabin is a model in itself and requires quite an amount of time but is good fun.It seems strange that all this work will not be seen when the cabin roof is installed. I did not use all the photo etch as some is extremely small and would not add to the overall look.
.JPG)
.JPG)
.JPG)
.JPG)
I found it prudent to add all the parts to the sides and bulkhead before assembly as shown in the photo.
ASSEMBLY-----
The time is now coming to assemble this model. The sections were painted first to make final coats easier
and to highlight any imperfections. It took a little bit of juggling to get it all to fit but now looks okay,
After this lot will be the running gear.
.JPG)
.JPG)
.JPG)
.JPG)
The next group of photo`s will be the finished BR 52..........COMING SOON.
______________________________________________________________________
.JPG)
.JPG)
.JPG)
.JPG)
.JPG)
The project is finished to the point of all assembly completed.
The loco has been sprayed with Future to protect the paint but I still have to weather the loco with a burnt umber wash so as to match the finish on the tender.
When that is done I will attempt some outside photography to see if I can blend it in with some countryside.
That will be my next experiment.
Here are the finished detailed photos.
+(2).JPG)
.JPG)
.JPG)
Thanks for looking.
Les
No comments:
Post a Comment